
Step 1: Apply the nose

I used a black eyeliner pencil (anything will do) to line the shape of the nose that I wanted before I filled it in. Lining everything first will allow you to fix anything before it gets too dramatic! For filling it in, I used a black gel liner to ensure that it would be solid black. I usually use Maybelline's gel liner in blackest black but I was out so I found one around my house by Mary Kay which I actually really liked because it's not super creamy (which is good for halloween makeup because you don't want that black smudging everywhere.)
Step 2: Apply white above your lip, below the nose

For the white, I used Ben Nye's character wheel in red, black and white and I just applied a generous amount with my finger allowing for the perfect blend.
Step 3: Apply a black line below the nose, dots for the whiskers, and on the upper lip

Sorry the dots are so subtle in this picture, they looked great in real life but you get the idea. Again using a black pencil first, then the gel liner, I drew a line from the center of my nose meeting the center of my upper lip and blended. I chose to fill in my upper lip only because I thought that it would be more realistic. I really liked the way it turned out!
Step 4: Apply white in your highlight area in the center of the face (forgot the chin in this picture)

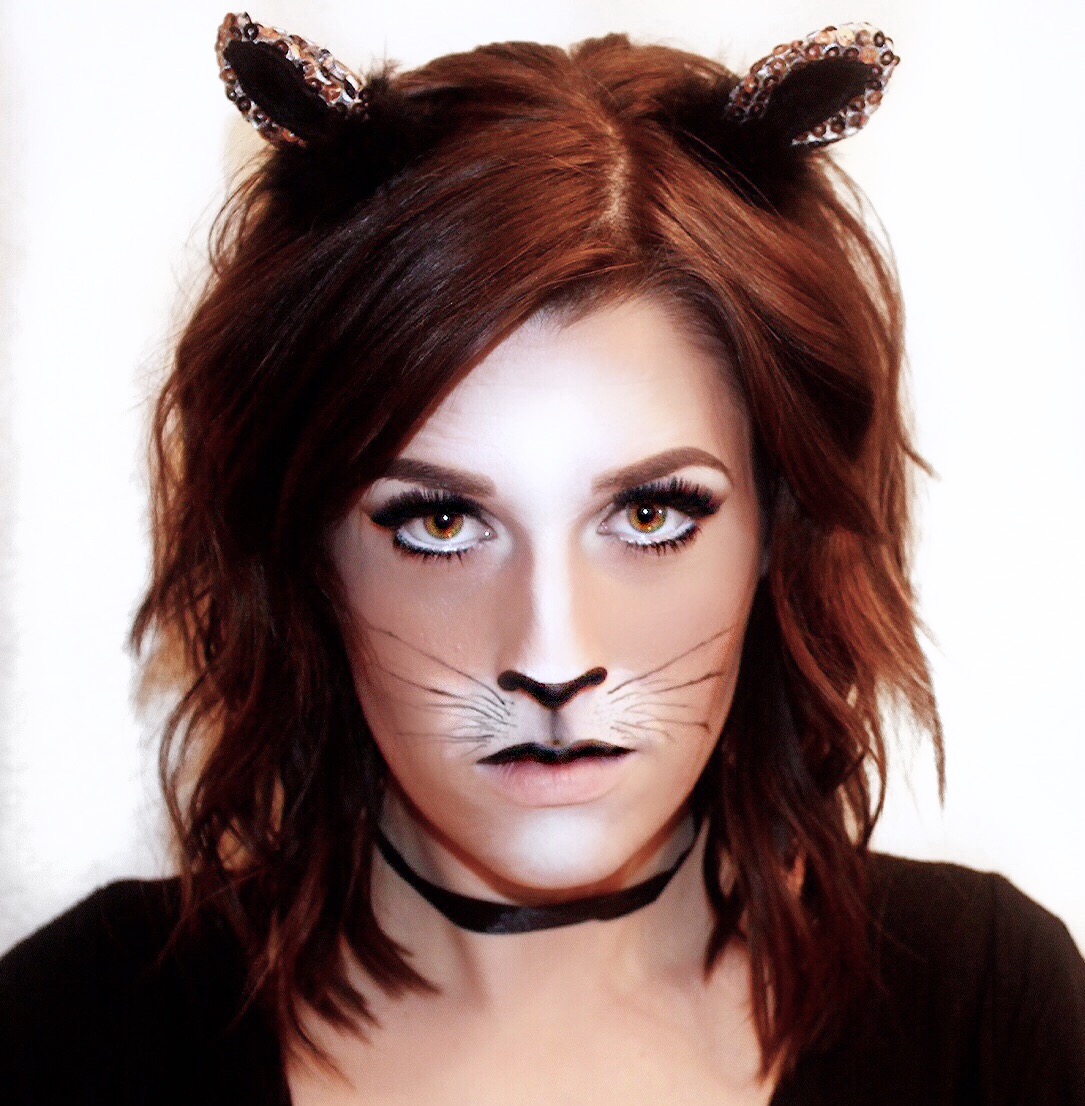
Step 5: Apply color to the rest of the face and add your whiskers

I used Anastasia Beverly Hills darkest shade in her contour kit mixed with a little, and I mean a little, black eyeshadow (any will do, I used a black shadow in my Lorac Pro palette) and applied that over the rest of my face. For the whiskers, have fun with it! I didn't want mine to be super perfect and straight so as you can see some of them are shorter and more wavy then others.
There is no right or wrong with this look so be creative and have fun with it!
xoxo

I love the creativity behind using everyday makeup products for a unique cat-eye effect.
ReplyDelete